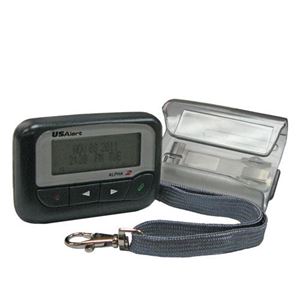
The Alpha 2 Programmer is setup by attaching the USB cable to an available port on the computer and to the USB connection of the programming fixture. The power LED on the programming fixture next to the USB connection should turn green. Install and run the latest version of the programming software, the screen should display “J25 Programmer”. To select the Alpha 2 programming features from the three pager types available, click on “J25 Programmer”. The resulting display changes to “J25”. Press the “Configure” button to show programming options. “USB programmer connected” should be displayed at the bottom left of the screen and a “NO PAGER” indication next to it.
Programming or reading an Alpha 2 Pager can be performed with or without a battery present. The silicon protector from the back of the Alpha 2 Pager must be removed and the holes lined up with the programming pins of the fixture. The pager is pressed down firmly until the “Read” and “Write” buttons of the programming software become active. The “NO PAGER” indication also changes to “PAGER INSERTED”. Continue holding the pager down in place while reading or programming.


